
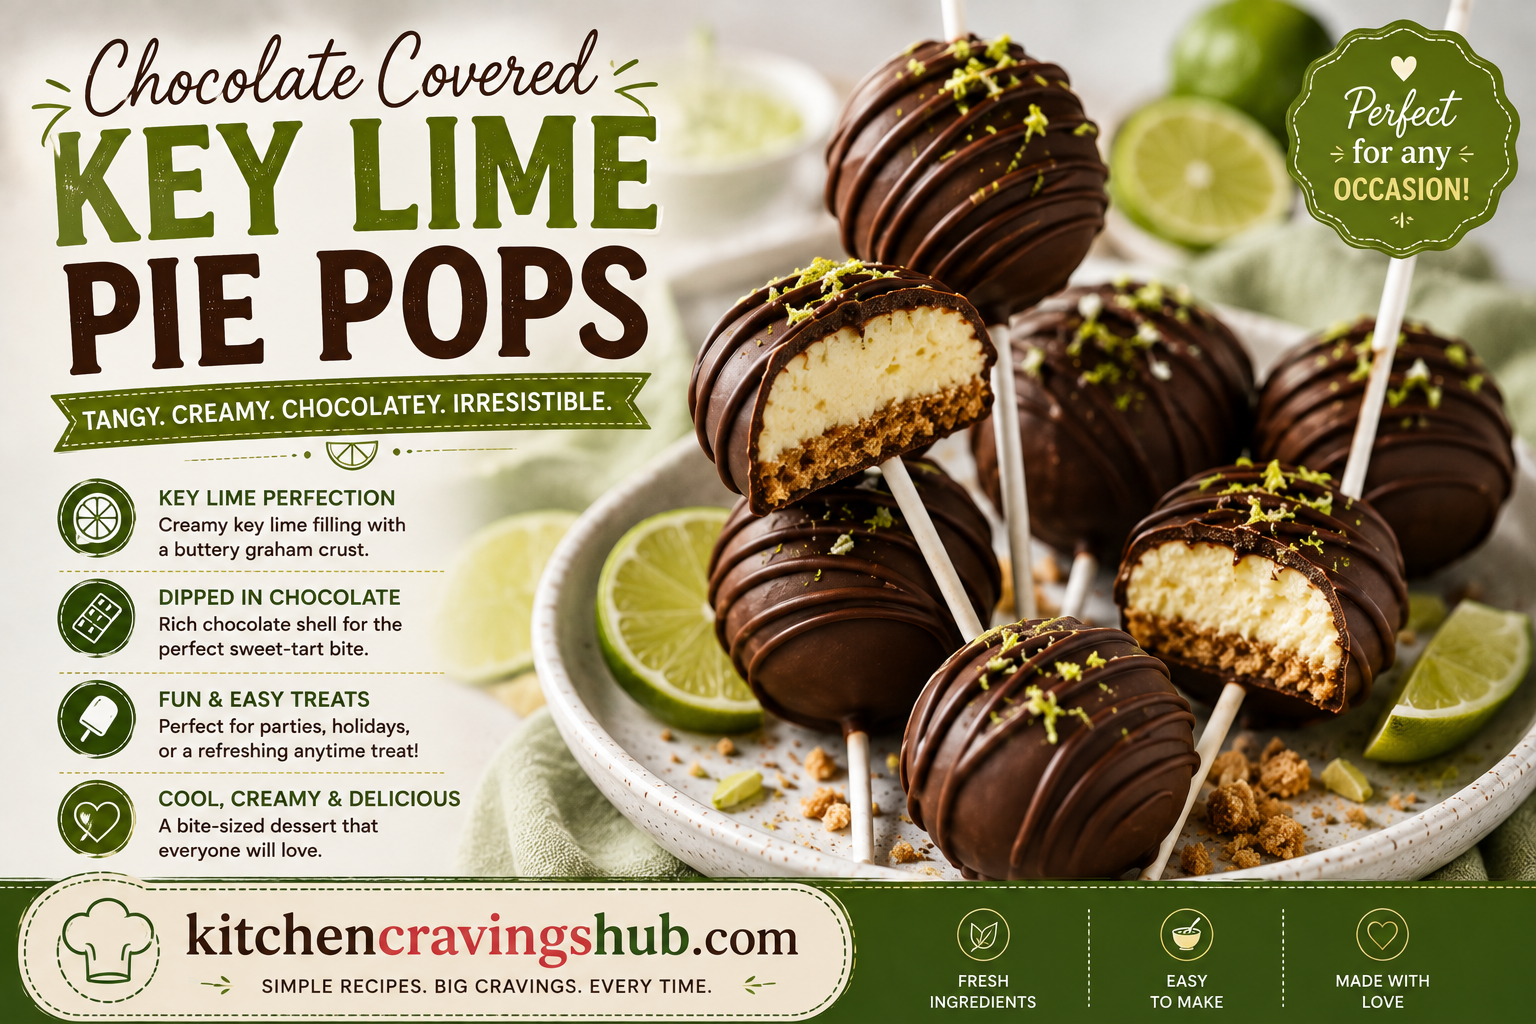
If you love the bright, tangy flavor of key lime pie but wish it came in a fun, portable, no fork required form, you are going to fall head over heels for these chocolate covered key lime pie pops. 🍫 They’re creamy, tart, sweet, and coated in a crisp chocolate shell, all on a stick, which somehow makes them taste even more delicious. They’re the kind of dessert that disappears within minutes at a party and gets requested again and again once people try their first bite.
Below you’ll find everything you need to make these adorable little pops at home, including step by step instructions, tips for the smoothest chocolate coating, flavor variations, storage advice, and answers to all the questions people usually ask about this recipe. Let’s dive in. 🍋✨
🥧 What Are Key Lime Pie Pops?
Key lime pie pops take everything you love about classic key lime pie, the buttery graham cracker crust, the tangy lime filling, and the sweet creamy texture, and turn it into a bite sized, cake pop style treat. The pie filling is blended with crushed graham crackers to create a soft, moldable dough, then rolled into balls, frozen until firm, dipped in melted chocolate, and finished with a sprinkle of graham cracker crumbs or lime zest on top.
They’re essentially a cross between a cake pop and a slice of pie, and they’re absolutely perfect for spring gatherings, summer parties, baby showers, or really any time you want a dessert that feels a little fancy but comes together with very little effort. 🌸
🍽️ Why You’ll Love This Recipe
- No baking required for the filling. You’ll use a store bought or homemade key lime pie filling, so there’s no oven time needed for the base.
- Perfectly portioned. Every pop is one perfect bite, no slicing or serving spoons required.
- Great make ahead dessert. These pops can be made a day or two in advance and stored in the freezer or fridge until you’re ready to serve them.
- Beautiful presentation. The bright green pie filling against the dark chocolate shell looks absolutely stunning on a dessert table.
- Kid and crowd friendly. Little hands love helping roll the pie balls, and everyone loves the fun, popsicle like presentation.
🍋 Ingredients You’ll Need
For the pie pop filling:
- 1 prepared key lime pie (store bought or homemade), chilled
- 1 cup graham cracker crumbs, plus extra for coating
- 2 tablespoons melted butter
- 1 teaspoon lime zest, plus more for garnish
For the chocolate coating:
- 2 cups white chocolate melting wafers or white chocolate chips
- 1 tablespoon coconut oil or shortening (helps create a smooth, glossy shell)
- A few drops of green food coloring gel (optional, for a fun tinted shell)
For decorating:
- Crushed graham crackers
- Extra lime zest
- White chocolate drizzle
- Lollipop sticks or cake pop sticks
👩🍳 How to Make Chocolate Covered Key Lime Pie Pops
Step 1: Break down the pie. Remove the crust from your key lime pie and set it aside in a separate bowl. Scoop the lime filling into a large mixing bowl.
Step 2: Crumble the crust. Crumble the graham cracker crust into fine crumbs, either with your hands or a food processor. You’ll use about a cup of these crumbs for the filling and save the rest for coating and garnish later.
Step 3: Combine the filling. Add the crumbled crust, melted butter, and lime zest to the bowl with the pie filling. Mix everything together until it forms a soft, slightly sticky dough. If the mixture feels too wet to roll, add a bit more graham cracker crumbs until it firms up.
Step 4: Roll into balls. Using a small cookie scoop or a tablespoon, portion out the mixture and roll it between your palms into smooth, even balls, about one inch in diameter. Place each ball onto a parchment lined baking sheet as you go.
Step 5: Freeze until firm. Place the tray of pie balls into the freezer for about one hour, or until they’re firm to the touch. This step is essential, since it keeps the pops from falling apart when dipped into warm chocolate.
Step 6: Insert the sticks. Once firm, dip the tip of each lollipop stick into a bit of melted white chocolate and insert it about halfway into each pie ball. This helps the stick adhere securely. Return the tray to the freezer for another ten to fifteen minutes to let the chocolate set.
Step 7: Melt the chocolate coating. In a microwave safe bowl, melt the white chocolate wafers and coconut oil together in thirty second bursts, stirring well between each round, until completely smooth. If you’re using food coloring gel, stir it in now until you reach your desired shade of green.
Step 8: Dip the pops. Working one at a time, dip each frozen pie pop into the melted chocolate, turning gently to coat evenly on all sides. Let any excess chocolate drip off before setting the pop upright in a foam block or a cup filled with rice or sugar to hold it steady.
Step 9: Decorate immediately. While the chocolate coating is still wet, sprinkle a bit of crushed graham cracker or fresh lime zest over the top. If you wait too long, the coating will set and the toppings won’t stick.
Step 10: Let them set completely. Allow the pops to sit at room temperature for about ten minutes, then transfer them to the refrigerator for another fifteen to twenty minutes to fully harden the chocolate shell.
🍫 Tips for the Best Key Lime Pie Pops
- Freeze the pie balls well before dipping. Skipping this step is the number one reason pops fall apart in the chocolate.
- Work in small batches. Keep the rest of your pops in the freezer while you dip a few at a time so they stay firm.
- Thin the chocolate if needed. If your melted chocolate feels too thick to coat smoothly, add a touch more coconut oil to loosen it up.
- Tap gently, don’t shake. After dipping, gently tap the stick against the side of the bowl to remove excess chocolate rather than shaking vigorously, which can cause the coating to crack.
- Use quality white chocolate. Real white chocolate or high quality melting wafers coat much more smoothly than lower quality chocolate chips.
🌈 Fun Variations to Try
Dark Chocolate Lime Pops 🍫 Swap the white chocolate coating for dark or semisweet chocolate for a rich, slightly bitter contrast against the tangy lime filling.
Coconut Lime Pops 🥥 Roll the finished pops in shredded coconut right after dipping for a tropical, pina colada inspired twist.
Extra Tart Pops 🍋 Add an additional teaspoon of lime zest and a small squeeze of fresh lime juice to the filling for an even brighter, tangier flavor.
Mini Meringue Topped Pops ☁️ Press a tiny dollop of store bought meringue or marshmallow fluff onto the top of each pop before the chocolate sets for a nod to classic meringue topped key lime pie.
Graham Crust Only Coating 🍯 Skip the chocolate altogether and simply roll the frozen pie balls in graham cracker crumbs for a lighter, no chocolate version.
🧊 How to Store Key Lime Pie Pops
Because these pops contain a creamy pie filling, proper storage matters for both taste and food safety.
- Refrigerator: Store the pops upright in an airtight container for up to four days. This is the best option if you plan to serve them within a few days of making them.
- Freezer: For longer storage, place the pops in a single layer in a freezer safe container, separated by parchment paper if stacking. They’ll keep well for up to one month. Let them thaw in the fridge for about twenty minutes before serving.
- Room temperature: Since the filling is dairy based, avoid leaving the pops out at room temperature for more than an hour or two, especially in warm weather.
🎉 Perfect Occasions for Key Lime Pie Pops
These pops are as versatile as they are delicious, making them a wonderful addition to all kinds of gatherings:
- Spring and summer garden parties 🌷
- Baby showers and bridal showers 🎀
- Beach themed birthday parties 🏖️
- Fourth of July dessert tables 🎆
- Mother’s Day brunch spreads 🌸
- Anytime you want a fun, handheld twist on a classic pie 🍋
Their bright color and cheerful presentation make them an especially popular choice for warm weather celebrations, though honestly, they’re delicious enough to make any time of year.
❓ Frequently Asked Questions About Key Lime Pie Pops
Can I use a homemade key lime pie instead of store bought? Absolutely. A homemade pie actually works wonderfully here, since you can control the tartness and sweetness of the filling to your exact preference.
What can I use instead of key limes? If key limes aren’t available, regular limes work perfectly well as a substitute. The flavor will be slightly less tart but still delicious.
Why did my chocolate coating crack after dipping? This usually happens when the pie balls are too cold compared to the melted chocolate, or when the coating layer is applied too thickly. Letting the pops sit at room temperature for a minute or two before dipping can help, along with using a thinner, well tempered chocolate coating.
Can I make these pops ahead of time for a party? Yes, these are a wonderful make ahead dessert. You can prepare them up to two days in advance and store them in the refrigerator, or freeze them up to a month ahead and thaw before your event.
Do I need special equipment to make these? Not really. A cookie scoop, a baking sheet, parchment paper, and lollipop sticks are all you need. A foam block or a cup filled with rice can help hold the pops upright while the chocolate sets, though a simple parchment lined tray works in a pinch too.
Can I skip the sticks and make these as bite sized truffles instead? Definitely. Simply skip the stick step and dip the frozen pie balls straight into the chocolate for a truffle style treat instead of a pop.
🍋 Final Thoughts
Chocolate covered key lime pie pops are one of those desserts that feel a little bit fancy and a whole lot fun, all while being surprisingly simple to make at home. With a creamy, tangy lime filling wrapped in a crisp chocolate shell, they capture everything wonderful about key lime pie in one perfectly portable bite. Whether you’re planning a spring celebration, a summer get together, or just want to try something new in the kitchen, these pops are guaranteed to be a hit with everyone who tries them. 🍫✨
Give this recipe a try, and don’t be surprised if it becomes your new go to dessert for every warm weather gathering on the calendar. Happy dipping! 🍋🎉