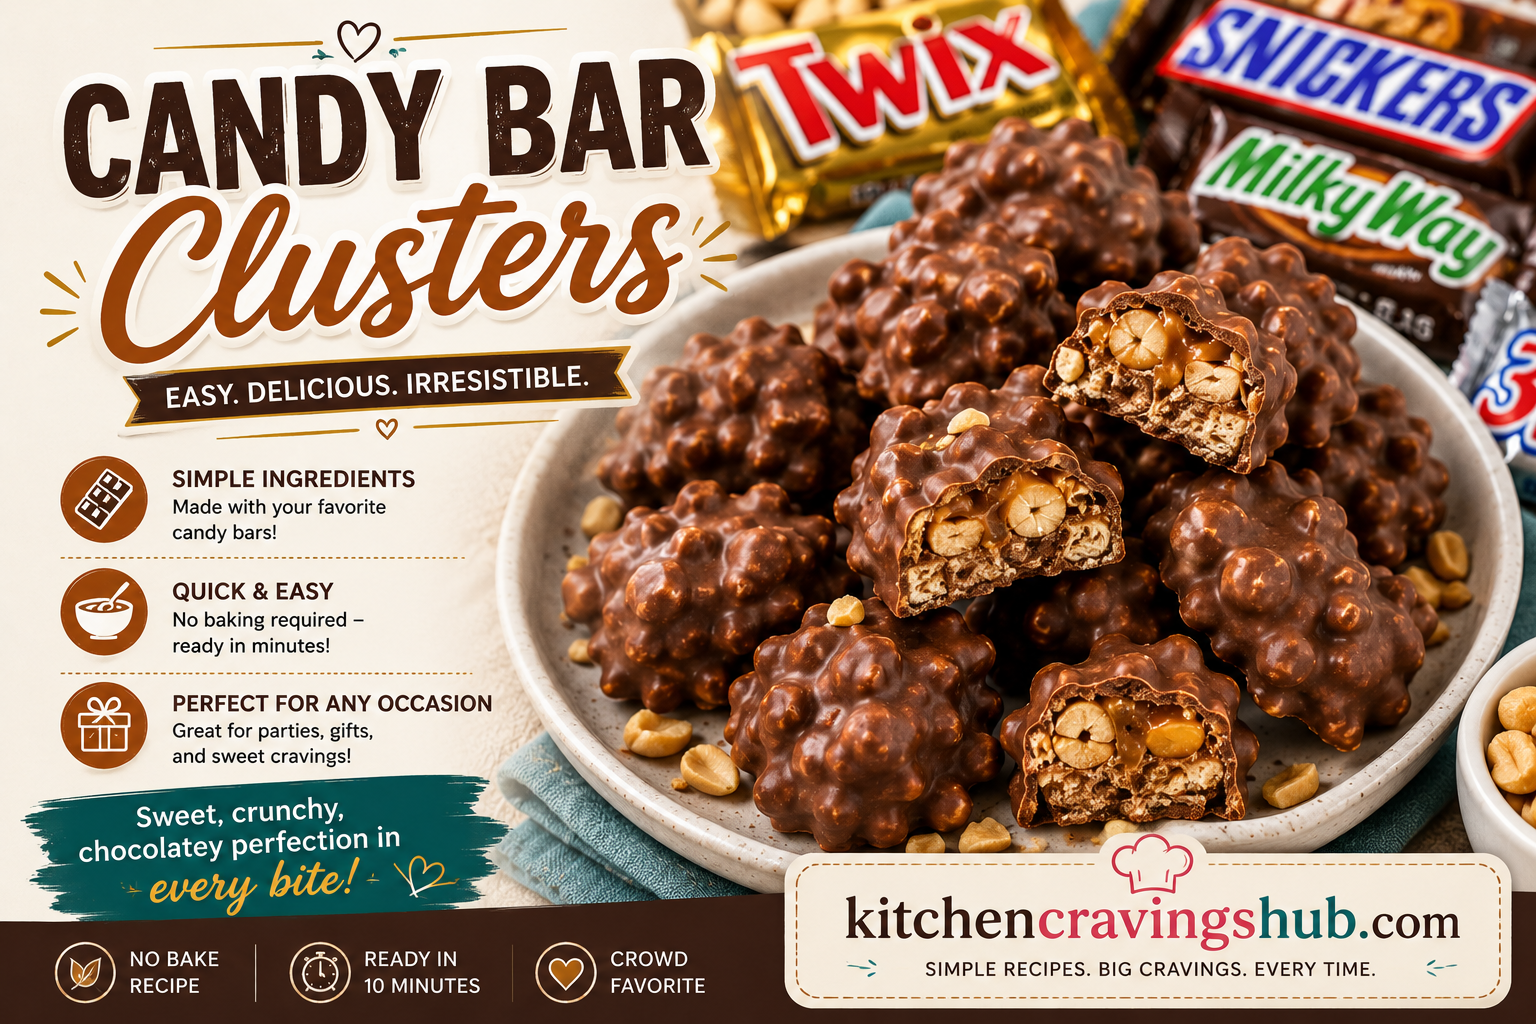
If you’re looking for a sweet treat that takes minutes to throw together, requires zero baking skills, and disappears from the plate faster than you can say “one more piece,” candy bar clusters are about to become your new favorite recipe. 🎉
These little bites are exactly what they sound like: a chunky, crunchy, gooey mix of chopped candy bars, melted chocolate, and a few crowd pleasing mix ins, scooped into clusters and left to set until they’re firm enough to hold together but still melt in your mouth. They’re part fudge, part bark, part candy dish raid, and one hundred percent addictive.
Below you’ll find everything you need to make the best candy bar clusters at home, including my go to ingredient combos, step by step instructions, storage tips, and answers to the most common questions people ask about this recipe. Let’s get into it. 🍬
🍭 What Are Candy Bar Clusters?
Candy bar clusters are a no bake candy made by combining melted chocolate (or a chocolate and candy melt blend) with chopped up candy bars, pretzels, nuts, or cereal, then dropping spoonfuls onto a lined tray to harden into little clusters. Think of them as a cross between chocolate bark and a loaded cookie, minus the oven.
They’re incredibly popular around the holidays, for bake sales, for school parties, and honestly, just for a random Tuesday when you’re craving something sweet and salty. Because the base recipe is so forgiving, you can customize it endlessly depending on what candy you have leftover in your pantry (hello, post Halloween candy bowl). 🎃
🛒 Why You’ll Love This Recipe
There are a lot of reasons candy bar clusters have become such a beloved treat, but here are my top few:
- No oven required. This is a true no bake dessert, which makes it perfect for hot summer days or when your oven is already busy with something else.
- Ready in under thirty minutes. Once the chocolate is melted and mixed, you’re basically done.
- Endlessly customizable. Swap in whatever candy bars, nuts, or mix ins you love or already have on hand.
- Great for gifting. Pile a few clusters into a cute tin or bag and you have an instant homemade gift.
- Kid friendly. This is a fantastic recipe to make with little ones since there’s no hot oven involved, just careful microwave or stovetop melting with adult supervision.
🍫 Ingredients You’ll Need
Here’s a simple, classic version of candy bar clusters to get you started. Feel free to treat this as a base recipe and get creative with substitutions later on.
For the chocolate base:
- 2 cups semisweet chocolate chips
- 1 cup milk chocolate chips
- 1 tablespoon coconut oil or shortening (this helps the chocolate set with a smooth, glossy finish)
For the mix ins:
- 2 cups chopped candy bars (think chocolate caramel bars, peanut butter cups, or crispy wafer bars)
- 1 cup mini pretzels, roughly broken
- 1 cup salted peanuts or mixed nuts
- 1/2 cup mini marshmallows (optional, for extra fluffy texture)
- Flaky sea salt, for sprinkling on top
You really can’t go wrong here. The key ratio to remember is about equal parts melted chocolate to mix ins, so the clusters hold together nicely without falling apart or being overly chocolate heavy. ⚖️
👩🍳 How to Make Candy Bar Clusters
Step 1: Prep your tray. Line a large baking sheet with parchment paper or a silicone baking mat. This makes cleanup easy and prevents the clusters from sticking once they set.
Step 2: Melt the chocolate. In a microwave safe bowl, combine the chocolate chips and coconut oil. Microwave in thirty second bursts, stirring well between each one, until the chocolate is fully melted and smooth. You can also melt the chocolate using a double boiler on the stovetop if you prefer.
Step 3: Chop your candy and mix ins. While the chocolate melts, roughly chop your candy bars into bite sized pieces. Break the pretzels into smaller chunks if needed and measure out your nuts and marshmallows.
Step 4: Combine everything. Once the chocolate is melted and smooth, fold in the chopped candy bars, pretzels, nuts, and marshmallows if using. Stir gently but thoroughly so every piece gets coated in chocolate.
Step 5: Scoop into clusters. Using a cookie scoop or a large spoon, drop mounds of the mixture onto your prepared tray, spacing them about an inch apart. Sprinkle the tops with a little flaky sea salt while the chocolate is still warm and glossy.
Step 6: Let them set. Place the tray in the refrigerator for about twenty to thirty minutes, or until the clusters are firm to the touch. If you’re in a rush, the freezer will speed this up to around ten minutes.
Step 7: Enjoy and store. Once set, the clusters are ready to eat immediately, or you can store them for later (see storage tips below). 🍽️
🍬 Best Candy Bars to Use in This Recipe
One of the best parts of this recipe is that it works with almost any candy bar you love. Here are some fan favorite combinations to try:
- Classic caramel and nougat bars, chopped into chunky pieces for gooey pockets throughout
- Peanut butter cups, quartered for little bursts of salty sweet flavor
- Crispy wafer bars, which add a satisfying crunch that contrasts beautifully with the melted chocolate
- Chocolate covered toffee bars, for a buttery, slightly crunchy addition
- Coconut and almond bars, chopped small for a tropical twist
If you’re making this after a holiday, leftover trick or treat candy works perfectly here too. It’s honestly one of the best ways to use up an overflowing candy bowl. 🎃🍭
🥜 Fun Variations to Try
Once you’ve made the classic version, try switching things up with one of these fun variations:
Peanut Butter Lovers Clusters 🥜 Swap half the chocolate chips for peanut butter chips and add extra chopped peanut butter cups to the mix.
Rocky Road Clusters 🍫 Add mini marshmallows and chopped walnuts or almonds for a nostalgic rocky road twist.
Salty Pretzel Clusters 🥨 Increase the pretzel ratio and skip the marshmallows for a more savory, salty sweet bite.
White Chocolate Holiday Clusters ❄️ Use white chocolate chips as your base and mix in crushed peppermint candy and red and green candy pieces for a festive holiday version.
Trail Mix Clusters 🌰 Add dried cranberries, sunflower seeds, and a mix of nuts for a slightly more grown up, snackable version.
🧊 How to Store Candy Bar Clusters
Candy bar clusters store beautifully, which makes them a great make ahead treat for parties, holidays, or just having something sweet on hand throughout the week.
- Room temperature: Store in an airtight container for up to one week, especially if your kitchen stays cool.
- Refrigerator: Keep them in an airtight container in the fridge for up to two weeks. This is especially helpful if your kitchen runs warm, since chocolate can soften at room temperature.
- Freezer: For longer storage, freeze the clusters in a single layer, then transfer to a freezer safe bag or container. They’ll keep well for up to three months. Simply thaw at room temperature for about ten minutes before enjoying.
🎁 Tips for Perfect Candy Bar Clusters Every Time
- Don’t overheat the chocolate. Melting slowly in short bursts prevents the chocolate from seizing or turning grainy.
- Use a mix of textures. Combining crunchy, chewy, and salty ingredients creates the most satisfying bite.
- Work quickly once mixed. The chocolate starts to firm up fast, so scoop your clusters onto the tray soon after combining everything.
- Add salt at the right time. Sprinkle flaky salt on top while the chocolate is still soft so it sticks properly.
- Size them consistently. Using a cookie scoop helps keep the clusters uniform, which makes them look extra polished if you’re gifting or serving them at a party.
🎄 Perfect for Any Occasion
Candy bar clusters are one of those treats that fit almost any occasion. Here are just a few ideas for when to make them:
- Holiday cookie trays and gift tins 🎁
- Post Halloween candy clean out 🎃
- Movie night snack bowls 🍿
- School bake sales and class parties 🎒
- Quick last minute desserts for unexpected guests 🍽️
Because they come together so quickly and use ingredients you likely already have, this is a recipe you’ll find yourself making again and again throughout the year.
❓ Frequently Asked Questions About Candy Bar Clusters
Can I make candy bar clusters without a microwave? Absolutely. Simply melt your chocolate using a double boiler on the stovetop. Fill a saucepan with an inch or two of water, place a heatproof bowl on top, and stir the chocolate gently over low heat until fully melted.
Why did my chocolate turn grainy or seize? This usually happens when chocolate overheats or comes into contact with even a small amount of water. Always melt chocolate slowly, use dry utensils and bowls, and stir frequently to keep it smooth.
Can I use candy melts instead of chocolate chips? Yes, candy melts work well in this recipe and are especially useful if you want vibrant colors for a themed dessert table. Keep in mind that candy melts have a slightly different flavor and texture compared to real chocolate.
How long do candy bar clusters last? Stored in an airtight container, they’ll stay fresh for about a week at room temperature, up to two weeks in the fridge, or up to three months in the freezer.
Can I make this recipe nut free? Definitely. Simply leave out the peanuts or any nut based candy bars and swap in extra pretzels, mini marshmallows, or crispy rice cereal for crunch instead.
What’s the best way to chop candy bars without making a mess? Pop the candy bars in the freezer for about ten minutes before chopping. This firms them up and makes them much easier to cut into clean, even pieces without sticking to your knife.
🍫 Final Thoughts
Candy bar clusters are proof that some of the best desserts are also the simplest ones. With just a handful of ingredients, a few minutes of prep, and zero oven time, you can whip up a batch of sweet, salty, crunchy, gooey clusters that everyone at the table will be reaching for seconds of. Whether you’re making them for a holiday gathering, using up extra Halloween candy, or just craving something sweet on a random weeknight, this recipe is one you’ll want to keep on repeat. 🍬🎉
Give it a try this week, and don’t be surprised if it becomes your new go to treat for every occasion. Happy snacking! 🍫✨