
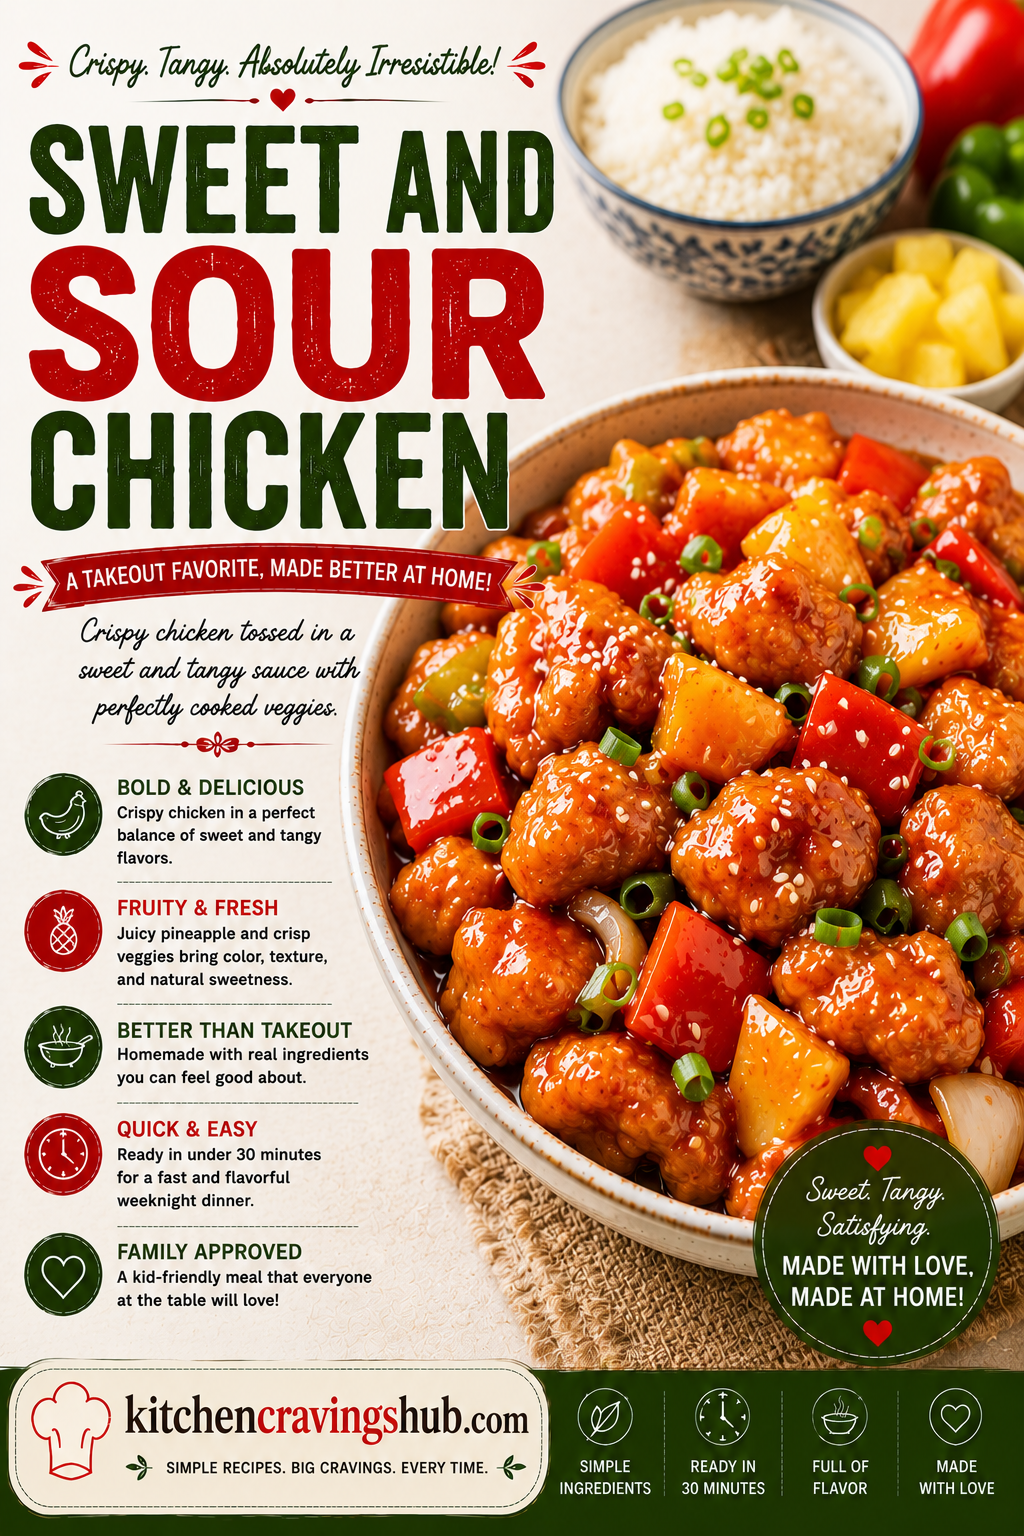
If there is one dish that instantly makes a table feel exciting, it is sweet and sour chicken. That gorgeous glossy red sauce, the crispy golden chicken pieces, and the little pops of pineapple and bell pepper hiding in every bite. It is the kind of meal that turns a boring Tuesday into something worth looking forward to. 😋
In this guide, I am going to walk you through everything you need to know about sweet and sour chicken. We will cover where it comes from, why people love it so much, the exact ingredients you need, a full step by step recipe, tips for getting that perfect crunch, common mistakes people make, healthier swaps, and answers to the questions people ask most often. Grab a notebook or just bookmark this page, because by the end you will be able to make restaurant quality sweet and sour chicken right in your own kitchen. 🧑🍳
What Is Sweet and Sour Chicken? 🤔
Sweet and sour chicken is a beloved dish that combines crispy fried chicken pieces with a vibrant, tangy, and sweet sauce. The sauce is usually made from a mix of sugar, vinegar, ketchup or tomato paste, and sometimes pineapple juice for extra fruitiness. Vegetables like bell peppers, onions, and pineapple chunks are added for color, crunch, and a burst of flavor in every bite.
While many people associate this dish with Chinese restaurants across the United States, United Kingdom, and other Western countries, the version served in most takeout spots is actually a Westernized adaptation. The original inspiration traces back to a Cantonese cooking technique that balances sweet and sour flavors, a concept that has existed in Chinese cuisine for centuries. Over time, as Chinese immigrants opened restaurants abroad, the dish evolved to include ingredients that were more available and appealing to local tastes, like ketchup and canned pineapple.
Today, sweet and sour chicken sits proudly on menus everywhere, from casual takeout counters to home dinner tables. It is loved because it hits every note you want in a meal: crunchy texture, bold flavor, a bit of sweetness, a bit of tang, and just enough sauce to coat every piece perfectly. 🌟
Why Everyone Loves Sweet and Sour Chicken ❤️
There are a few reasons this dish has such a huge following.
First, it appeals to both kids and adults. Kids love the sweetness and the fun colors of the peppers and pineapple. Adults appreciate the balance of flavors and how satisfying the crispy chicken feels.
Second, it is incredibly versatile. You can serve it over steamed white rice, fried rice, noodles, or even alongside a simple salad for a lighter meal. It also works beautifully as a party dish because it looks impressive without requiring fancy plating.
Third, making it at home means you control the ingredients. Restaurant versions can be loaded with excess sugar, sodium, and oil. When you cook it yourself, you decide exactly how sweet, how tangy, and how healthy you want it to be. 🥦
Finally, it is simply fun to make. There is something satisfying about watching chicken turn golden and crispy, then tossing it in a bubbling, glossy sauce that clings to every piece. It feels like a mini cooking show happening right on your stovetop.
Ingredients You Will Need 🛒
Here is a breakdown of everything required to make a fantastic batch of sweet and sour chicken at home.
For the Chicken
Boneless, skinless chicken breast or chicken thighs, cut into bite sized cubes. Thighs tend to stay juicier, while breast meat is leaner. Cornstarch, which helps create that signature crispy coating. All purpose flour, for extra crunch when combined with cornstarch. Eggs, to help the coating stick to the chicken. Salt and black pepper, for seasoning the chicken before frying. Oil for frying, such as vegetable oil, canola oil, or peanut oil, all of which have a high smoke point.
For the Sauce
Ketchup or tomato paste, which gives the sauce its rich red color and a slightly tangy base. Rice vinegar or apple cider vinegar, for that sour punch. Granulated sugar or brown sugar, for sweetness. Pineapple juice, ideally from a can of pineapple chunks, which adds natural fruity sweetness. Soy sauce, for a touch of umami depth. Garlic and ginger, minced or grated, for aromatic flavor. Cornstarch mixed with water, used as a thickening agent for the sauce.
For the Vegetables and Extras
Bell peppers, a mix of red, green, and yellow for color and crunch. Onion, cut into chunks. Pineapple chunks, either fresh or canned. Green onions or sesame seeds, for garnish at the end. 🌿
Step by Step Recipe: How to Make Sweet and Sour Chicken 👩🍳
Now let us get into the actual cooking process. This recipe generally serves about four people and takes roughly forty five minutes from start to finish, including prep time.
Step 1: Prepare the Chicken
Cut your chicken into even, bite sized cubes. Keeping the pieces uniform helps them cook at the same rate. Season lightly with salt and pepper. In one bowl, whisk a couple of eggs. In another bowl, combine cornstarch and flour in roughly equal parts. Dip each chicken piece into the egg first, then coat thoroughly in the flour and cornstarch mixture, pressing gently so the coating sticks well.
Step 2: Fry the Chicken Until Golden
Heat oil in a deep pan or wok until it reaches around 350 degrees Fahrenheit. Fry the chicken pieces in small batches so the pan is not overcrowded, which keeps the oil temperature steady and ensures even crisping. Cook each batch for about three to four minutes, or until golden brown and cooked through. Remove and place on a wire rack or paper towel lined plate to drain excess oil.
For an extra crispy result that holds up well once tossed in sauce, many home cooks fry the chicken twice. The first fry cooks it through, and a quick second fry at a slightly higher temperature makes the crust extra crunchy and helps it stay crispy longer after mixing with the sauce.
Step 3: Make the Sauce
In a saucepan over medium heat, combine ketchup, rice vinegar, sugar, pineapple juice, and soy sauce. Stir well and let it come to a gentle simmer. Add minced garlic and ginger for that aromatic kick. In a small bowl, mix cornstarch with a little cold water to make a slurry, then slowly pour it into the simmering sauce while stirring constantly. The sauce should thicken within a minute or two into a glossy, spoon coating consistency.
Step 4: Cook the Vegetables
In a separate pan or wok, heat a small amount of oil and quickly stir fry your bell peppers and onions over high heat for two to three minutes. You want them to stay slightly crisp rather than fully soft, since they will continue cooking slightly once mixed with the hot sauce. Add pineapple chunks toward the end just to warm them through.
Step 5: Combine Everything
Add the crispy fried chicken and the stir fried vegetables into the pan with the sauce. Toss everything together gently but quickly so the sauce coats every piece evenly without making the chicken soggy. Serve immediately while the chicken is still crispy.
Step 6: Garnish and Serve
Sprinkle sesame seeds and chopped green onions on top for a fresh finishing touch. Serve over steamed jasmine rice, fried rice, or noodles. 🍚
Pro Tips for the Best Sweet and Sour Chicken 💡
Cut chicken into evenly sized pieces so everything cooks at the same rate.
Do not skip the double fry method if you want that authentic restaurant style crunch that lasts even after the sauce is added.
Add the sauce right before serving. If the chicken sits in the sauce too long before you eat, it will lose its crispiness.
Balance is everything. Taste your sauce as it simmers and adjust the sugar or vinegar depending on how sweet or tangy you prefer it.
Use fresh pineapple when possible for a brighter, less processed flavor, though canned pineapple works wonderfully too and is often more convenient.
Keep your oil temperature consistent while frying. Oil that is too cool will make the chicken greasy, while oil that is too hot can burn the coating before the chicken cooks through.
Common Mistakes to Avoid ⚠️
Overcrowding the frying pan. This drops the oil temperature quickly and results in soggy, unevenly cooked chicken instead of crispy pieces.
Adding the sauce too early. If you toss the chicken in sauce and let it sit for a long time before eating, the crispy coating will soften.
Using too much cornstarch slurry. A little goes a long way. Adding too much can make the sauce gluey instead of silky and glossy.
Not seasoning the chicken before coating. Even though the sauce is flavorful, unseasoned chicken can taste bland underneath all that crunch.
Skipping the vegetable prep. Cutting vegetables unevenly means some pieces will be undercooked while others turn mushy.
Healthier Ways to Make Sweet and Sour Chicken 🥗
If you love this dish but want a lighter version, there are several simple swaps you can try.
Bake or air fry the chicken instead of deep frying. Toss the coated chicken pieces with a little oil and bake at around four hundred degrees Fahrenheit, or use an air fryer, until golden and crispy. This drastically cuts down on the amount of oil used.
Reduce the sugar in the sauce and let the natural sweetness of pineapple carry more of the flavor.
Use chicken breast instead of thighs for a leaner protein option.
Add more vegetables like broccoli, snap peas, or carrots to boost the nutrition and fiber content of the dish.
Swap white rice for brown rice, cauliflower rice, or quinoa for extra fiber and a lower glycemic impact.
What to Serve With Sweet and Sour Chicken 🍽️
Sweet and sour chicken pairs beautifully with a variety of side dishes. Steamed white rice is the classic choice since it soaks up the extra sauce perfectly. Fried rice adds even more flavor if you want a heartier meal. Lo mein or chow mein noodles work well too, especially if you are serving a bigger group.
For something lighter, try it alongside a simple cucumber salad, steamed broccoli, or a bowl of hot and sour soup to round out the meal. Spring rolls or dumplings also make a fantastic starter if you want to turn this into a full homemade takeout style dinner. 🥢
Storing and Reheating Leftovers 📦
If you have leftovers, store the chicken and sauce separately if possible, since this helps the chicken retain some crispiness when reheated. Keep everything in an airtight container in the refrigerator for up to three days.
To reheat, the oven or air fryer works best for keeping the chicken crispy. Spread the pieces out on a baking tray and reheat at around three hundred fifty degrees Fahrenheit for about ten minutes. Warm the sauce separately on the stove, then combine right before serving. Microwaving works in a pinch, but the coating will turn softer rather than crispy.
Frequently Asked Questions ❓
Is sweet and sour chicken really Chinese food? It is inspired by traditional Chinese sweet and sour cooking techniques, but the version most people know from takeout restaurants is a Westernized adaptation created to appeal to local tastes outside of China.
Can I make sweet and sour chicken without deep frying? Yes. Baking or air frying the coated chicken pieces is a great alternative that still delivers a crispy texture with far less oil.
What can I use instead of pineapple? If you are not a fan of pineapple, you can leave it out entirely or substitute with mandarin orange segments for a similar sweet and citrusy note.
Why is my sauce too thin or too thick? The cornstarch slurry controls thickness. If your sauce is too thin, mix a bit more cornstarch with cold water and stir it in while simmering. If it is too thick, add a splash of water or pineapple juice to loosen it up.
Can I make this dish ahead of time for meal prep? Yes, though it is best to store the chicken and sauce separately and combine them right before eating so the chicken stays crispy.
Is sweet and sour chicken gluten free? It can be made gluten free by using gluten free soy sauce and substituting the flour in the coating with a gluten free flour blend or additional cornstarch.
Final Thoughts 🌈
Sweet and sour chicken is one of those dishes that never really goes out of style. It brings together crunchy texture, bold color, and a flavor combination that somehow feels both comforting and exciting at the same time. Whether you are cooking for a family dinner, meal prepping for the week, or just craving your favorite takeout dish without leaving the house, this recipe gives you everything you need to make it happen.
The best part about making sweet and sour chicken at home is the freedom it gives you. You can adjust the sweetness, control the ingredients, experiment with vegetables, and even lighten it up with baking or air frying. Once you master the basic technique, you will find yourself making this dish again and again, tweaking it slightly each time until you land on your own perfect version.
So heat up that oil, get your sauce simmering, and enjoy the process. There is nothing quite like the moment you toss golden crispy chicken into that glossy red sauce and watch it come together right before your eyes. Happy cooking! 🍳🥳