
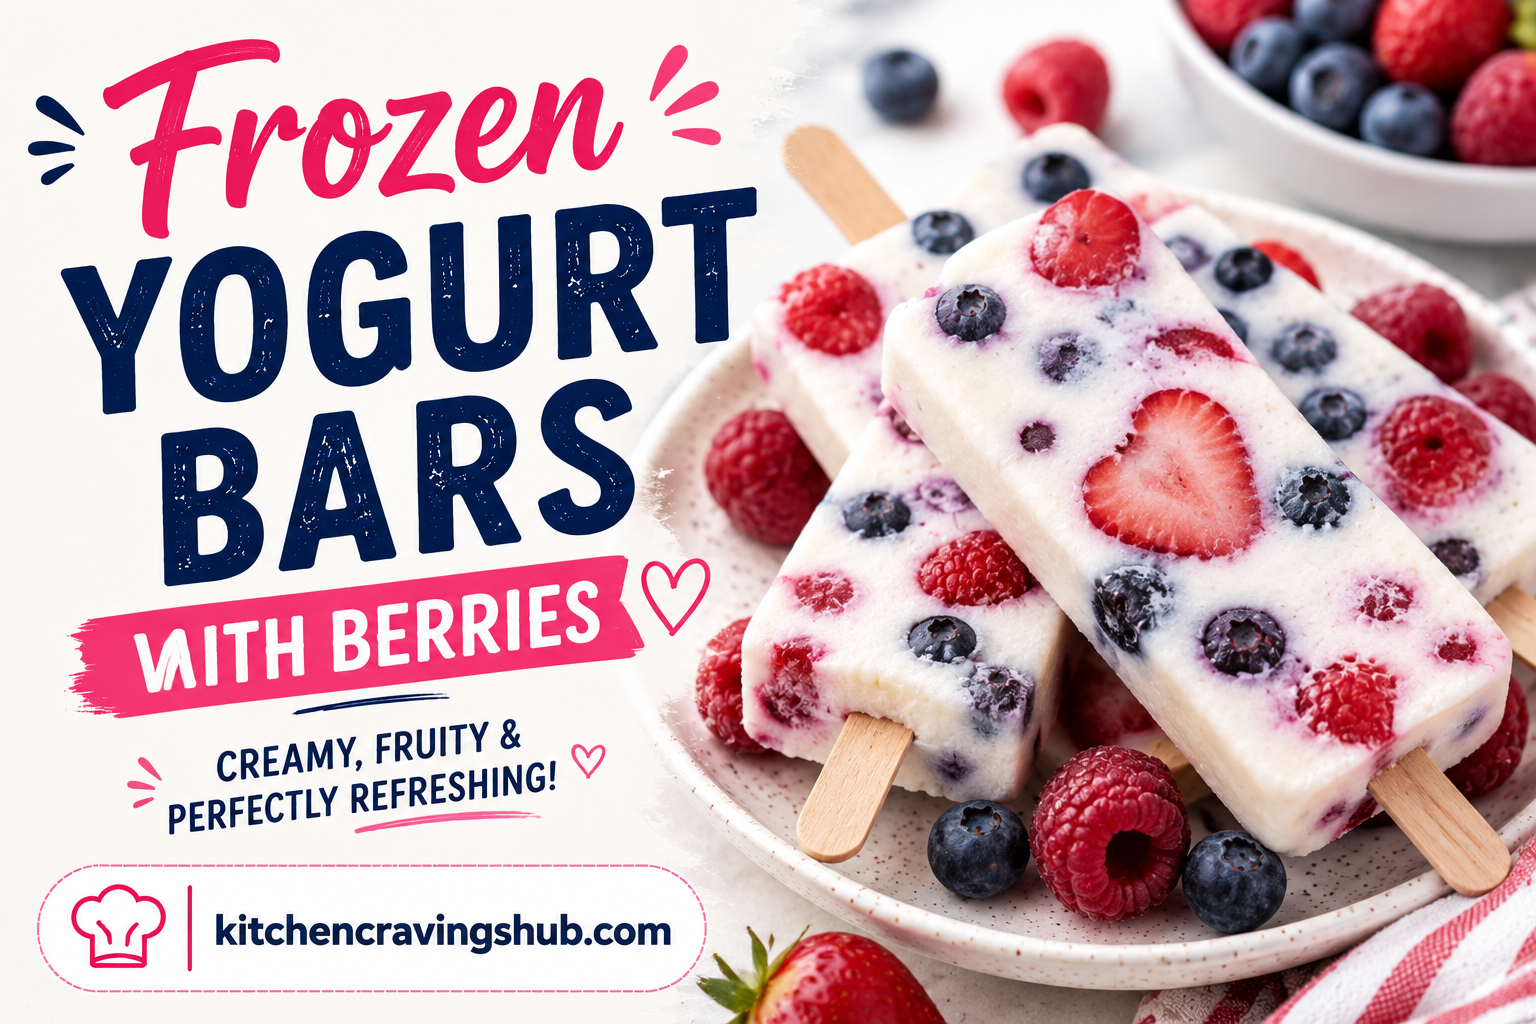
When the weather heats up, there’s nothing quite as satisfying as pulling a cold, creamy, fruity treat straight from the freezer. 🍦 These frozen yogurt bars with berries are exactly that: a refreshing, better for you dessert that tastes just as indulgent as ice cream but comes together with only a handful of simple, wholesome ingredients. They’re creamy, tangy, naturally sweetened, and studded throughout with juicy bursts of fresh berries in every single bite.
Below you’ll find everything you need to make these frozen yogurt bars at home, including step by step instructions, my favorite tips for getting that perfect creamy texture, fun flavor variations, storage advice, and answers to the most common questions people ask about this recipe. Let’s get freezing. 🍓✨
🍦 What Are Frozen Yogurt Bars?
Frozen yogurt bars are essentially a homemade, healthier take on the popsicles and ice cream bars you’d find in the freezer aisle. They’re made by blending or mixing creamy yogurt with a touch of sweetener and fresh fruit, pouring the mixture into a lined pan or mold, and freezing until firm enough to slice into neat, handheld bars.
Unlike traditional ice cream, these bars skip the heavy cream and eggs, relying instead on thick, protein packed yogurt as the base. The result is a treat that feels indulgent and satisfying, while still being a lighter option you can feel good about reaching for on a hot afternoon. Loaded with fresh berries, these bars also bring a naturally sweet, slightly tart flavor that pairs beautifully with the creamy yogurt base. 🍓🫐
💛 Why You’ll Love This Recipe
- No ice cream maker needed. These bars freeze right in a simple lined pan, no special equipment required.
- Naturally sweetened. Fresh berries and a touch of honey provide plenty of sweetness without needing a lot of added sugar.
- Protein packed. Thanks to the Greek yogurt base, these bars offer more protein than a typical ice cream treat.
- Easy to customize. Swap in whatever berries or fruit you have on hand or love most.
- Great for meal prep. Make a batch at the start of the week and enjoy a ready made frozen treat whenever a craving hits.
🍓 Ingredients You’ll Need
For the yogurt base:
- 3 cups thick Greek yogurt (whole milk or two percent for the creamiest texture)
- 1/3 cup honey or maple syrup
- 1 teaspoon vanilla extract
- A pinch of salt
For the berry layer:
- 2 cups mixed fresh berries (strawberries, blueberries, raspberries, and blackberries all work beautifully)
- 1 tablespoon honey, for lightly sweetening the berries
- 1 teaspoon lemon juice, to brighten the flavor
Optional mix ins:
- A swirl of berry puree through the yogurt base for a marbled look
- A sprinkle of granola pressed onto the bars before freezing for extra crunch
- A drizzle of melted white or dark chocolate over the finished bars
👩🍳 How to Make Frozen Yogurt Bars with Berries
Step 1: Prep your pan. Line an eight by eight inch baking pan with parchment paper, leaving a bit of overhang on the sides. This makes it much easier to lift the bars out once they’re frozen.
Step 2: Prepare the berries. Wash and chop your berries into small, bite sized pieces if using larger berries like strawberries. In a small bowl, toss the berries with a tablespoon of honey and the lemon juice, then set aside to macerate for about ten minutes. This helps release some of their natural juices and enhances their sweetness.
Step 3: Mix the yogurt base. In a large mixing bowl, whisk together the Greek yogurt, honey or maple syrup, vanilla extract, and a pinch of salt until smooth and well combined. Taste and adjust the sweetness to your liking.
Step 4: Layer the base. Pour about half of the yogurt mixture into the prepared pan, spreading it into an even layer with a spatula.
Step 5: Add the berries. Scatter half of the prepared berries evenly over the yogurt layer, gently pressing them in slightly so they nestle into the mixture.
Step 6: Repeat the layers. Pour the remaining yogurt mixture over the berry layer, spreading it evenly, then top with the remaining berries, pressing them gently into the surface.
Step 7: Add a swirl (optional). If you’d like a marbled effect, blend a small handful of extra berries into a smooth puree and drizzle it over the top layer, then swirl gently with a knife or skewer.
Step 8: Freeze until firm. Cover the pan loosely with plastic wrap or foil and freeze for at least four hours, or ideally overnight, until completely firm.
Step 9: Slice into bars. Once fully frozen, use the parchment paper overhang to lift the entire block out of the pan. Place it on a cutting board and slice into bars or squares using a sharp knife. For the cleanest cuts, run your knife under warm water and dry it between slices.
Step 10: Serve or store. Enjoy the bars immediately, or transfer them to a freezer safe container for later (see storage tips below). 🍓
🍯 Tips for the Best Frozen Yogurt Bars
- Use thick, strained yogurt. Regular yogurt tends to be too watery and can result in icy, less creamy bars. Greek yogurt or a strained skyr style yogurt gives the best texture.
- Pat berries dry if needed. Excess moisture from very juicy berries can create extra ice crystals, so a quick pat with a paper towel before layering can help.
- Don’t rush the freezing time. A full four hours minimum ensures the bars are firm enough to slice cleanly without falling apart.
- Use a sharp knife for slicing. A warm, sharp knife glides through frozen bars much more cleanly than a dull one, giving you neater edges.
- Line your pan well. Parchment paper with overhang makes removing and slicing the frozen block so much easier than trying to pry bars directly from the pan.
🌈 Fun Variations to Try
Tropical Yogurt Bars 🥭 Swap the berries for diced mango, pineapple, and a bit of shredded coconut for a bright, tropical twist.
Peanut Butter and Berry Bars 🥜 Swirl a few tablespoons of creamy peanut butter into the yogurt base along with the berries for a rich, nutty flavor combination.
Chocolate Dipped Berry Bars 🍫 Once fully frozen and sliced, dip the bottom half of each bar into melted dark chocolate and return to the freezer for a few minutes to set.
Green Smoothie Yogurt Bars 🥝 Blend a handful of spinach with the yogurt base (don’t worry, you won’t taste it) along with kiwi and green grapes for a fun, vibrant twist.
Cherry Vanilla Bars 🍒 Swap the mixed berries for pitted, chopped fresh or frozen cherries for a sweet, slightly tart variation.
🧊 How to Store Frozen Yogurt Bars
Because these bars are meant to be enjoyed frozen, proper storage is key to keeping them fresh and easy to grab whenever a craving strikes.
- Freezer: Store the sliced bars in an airtight, freezer safe container, layering with parchment paper between rows to prevent sticking. They’ll keep well for up to one month.
- Individually wrapped: For easy grab and go snacking, wrap each bar individually in parchment or wax paper before placing them in a freezer bag. This also helps prevent freezer burn.
- Serving tip: Let the bars sit at room temperature for about five minutes before eating for the creamiest texture, especially if your freezer runs particularly cold.
🍓 Perfect Occasions for Frozen Yogurt Bars
These bars fit beautifully into all kinds of everyday moments and special occasions alike:
- A refreshing after school or after work snack 🎒
- A lighter dessert option for summer dinner parties 🍽️
- Poolside treats that won’t melt into a puddle as quickly as regular ice cream 🏊
- A healthy addition to a kids’ summer snack rotation 👧
- A make ahead treat for a Fourth of July or summer birthday celebration 🎆
Their bright, colorful layers also make them a beautiful addition to any warm weather dessert table, no extra styling required.
❓ Frequently Asked Questions About Frozen Yogurt Bars with Berries
Can I use frozen berries instead of fresh? Yes, frozen berries work well in this recipe. Just thaw them first and drain any excess liquid before layering, to avoid extra ice crystals forming in the bars.
What yogurt works best for this recipe? Thick Greek yogurt or a strained skyr style yogurt gives the creamiest, least icy texture. Regular yogurt tends to be too thin and can result in a harder, icier bar.
How long do these bars need to freeze before slicing? Plan for at least four hours, though freezing overnight gives the most reliable, fully firm texture for clean slicing.
Can I make this recipe dairy free? Yes, a thick coconut milk yogurt or another plant based yogurt alternative can be used in place of Greek yogurt for a dairy free version.
Why are my bars turning out icy instead of creamy? This usually happens when the yogurt isn’t thick enough or when too much liquid from the berries gets mixed in. Using well drained fruit and a thick Greek yogurt helps keep the texture smooth.
Can I make these bars with less added sugar? Absolutely. Simply reduce the honey or maple syrup and let the natural sweetness of ripe, in season berries carry more of the flavor.
🍓 Final Thoughts
Frozen yogurt bars with berries are the kind of treat that feels like a genuine reward, cool, creamy, and bursting with fresh fruit flavor, while still being a lighter option you can feel good about enjoying often. With just a few simple ingredients and a little freezer time, you get a beautiful, colorful, layered dessert that’s perfect for hot days, quick snacking, or impressing guests at your next summer gathering. Once you make a batch, don’t be surprised if they become a permanent fixture in your freezer all season long. 🍦✨
Give this recipe a try, and enjoy every cool, creamy, fruity bite. Happy freezing! 🍓🎉